Shortcuts window preferences tab.
- Show Hookmark contextual window: ⌃H or ⇧⌘SPACE
- Show menu bar window: ⌃⌥⌘M
Other global keyboard shortcuts are listed and explained here.
Action ☰ button menu (⌃M)
The title bar contains a single Action ☰ button, which shows the Action menu. It contains the following menu items:
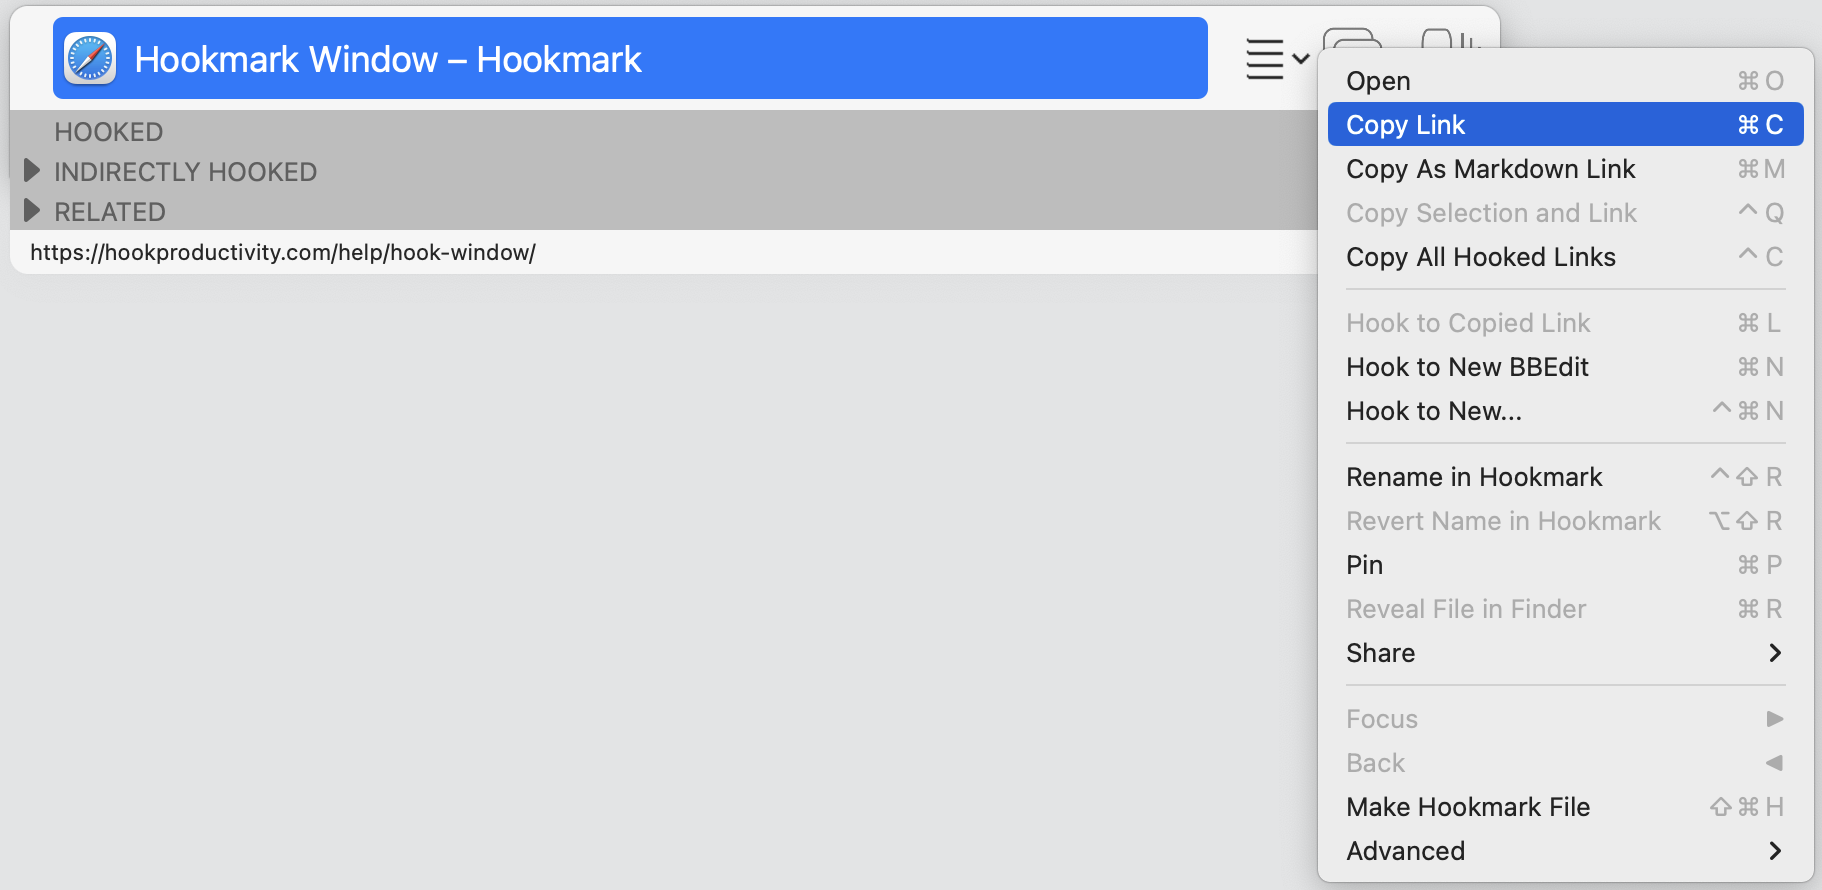
- Open: ⌘O
- Copy Link: ⌘C
Copy As Markdown Link: ⌘MCopy Selection and Link: ⌃Q (enabled for deep-linking PDF apps).Copy All Hooked Links:⌃CThis copies all the links associated with the title bar item as shown in the Links section of the Hookmark window.
Hold down the option (⌥) key and you will see the following 3 Universal Linking variants of the above :
- Copy As Universal Link: ⌥⌘C
Copy As Universal Markdown Link⌘⌥MCopy Selection and Universal Linkhttps://hookproductivity.com/help/hook-window/copy-as-universal-link/): ⌃⌥Q (enabled for deep-linking PDF apps).
- Hook to Copied Link: ⌘V or ⌘L
- Hook to New
<Default Note-Taking app>: ⌘N (For example, “Hook to New Pages…”. The app shown in this command is configurable in the Notes Preferences tab). - Hook to New…: ⌃⌘N
Hold down the option (⌥) key and you will see the following two “… As” variants of the above two commands, which let you choose the name and the location of the new items.
- Hook to New As…: ⌃⌥⌘N
- “Hook to New As
<Default Note-Taking app>: ⌃⌥⌘⇧N (For example, “Hook to New BBEdit”. The app shown in this command is configurable in the Notes Preferences tab). - Hook to New PDF
Rename in Hookmark: ⌃⇧RPin: ⌘P, unpin: ⌘P- ‘Tag’ ⌃T
- Reveal File in Finder: ⌘R (enabled if the title item is a file)
- Reveal Page in Pinboard: ⌘R (enabled if the title item is a web page and Pinboard is enabled)
-
Share
>See Access Hookmark Functions from the Share menu.
Focus: Places the selected link in title bar. Only enabled if the selection is not the title item.- Back ◀ (only presented if you have moved the focus away from the title bar onto a different link)
- Make Hookmark File (Pro only): ⇧⌘H
- Advanced
>Open All Hooked Items: ⌃⇧⌘O- Copy As Path
- Copy Link for Apple Mail: ⌥⇧C
Delete in Hookmark: ⌃⌫ : this removes the selected bookmark (not just the selected hook, if any); and it will delete any associated hooks. In other words, this removes everything Hookmark knows about the selected resource/address. This operation is not undoable.Add Bookmark Without Copying: ⌘D (only enabled if Hookmark does not already have a bookmark for this item)Revert Name in Hookmark(only enabled if you’ve renamed the bookmark)
There are more commands we’d like to put in the main part of the Title menu, but we don’t want to overwhelm new users. Nor do we want new users to think that Make Hookmark File, as handy as it is, is Hookmark’s main mode of operation.
Link menus (⌃L)
If you control click on a link, or use ⌃L, a popup menu will appear on the selected link (whether it is the primary selection or the secondary selection) :
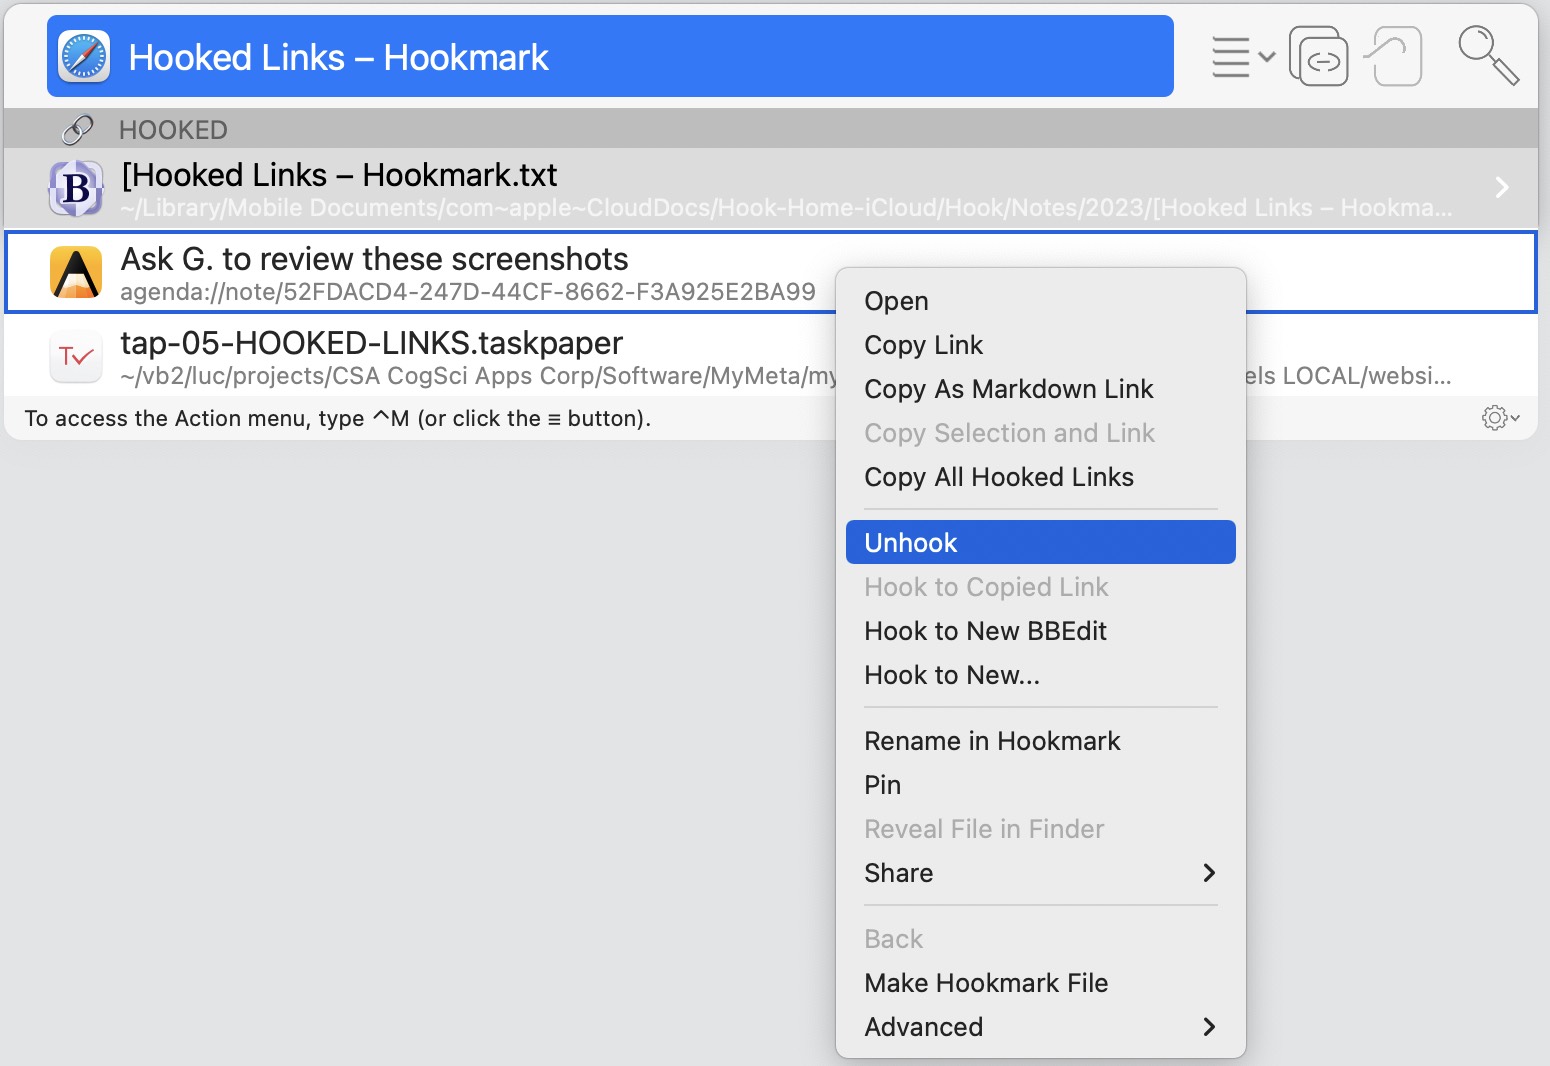
The contextual menu does not contain keyboard shortcut (following macOS guidelines). Instead we have shown their keyboard shortcuts in Gear Menu > Advanced > Link :
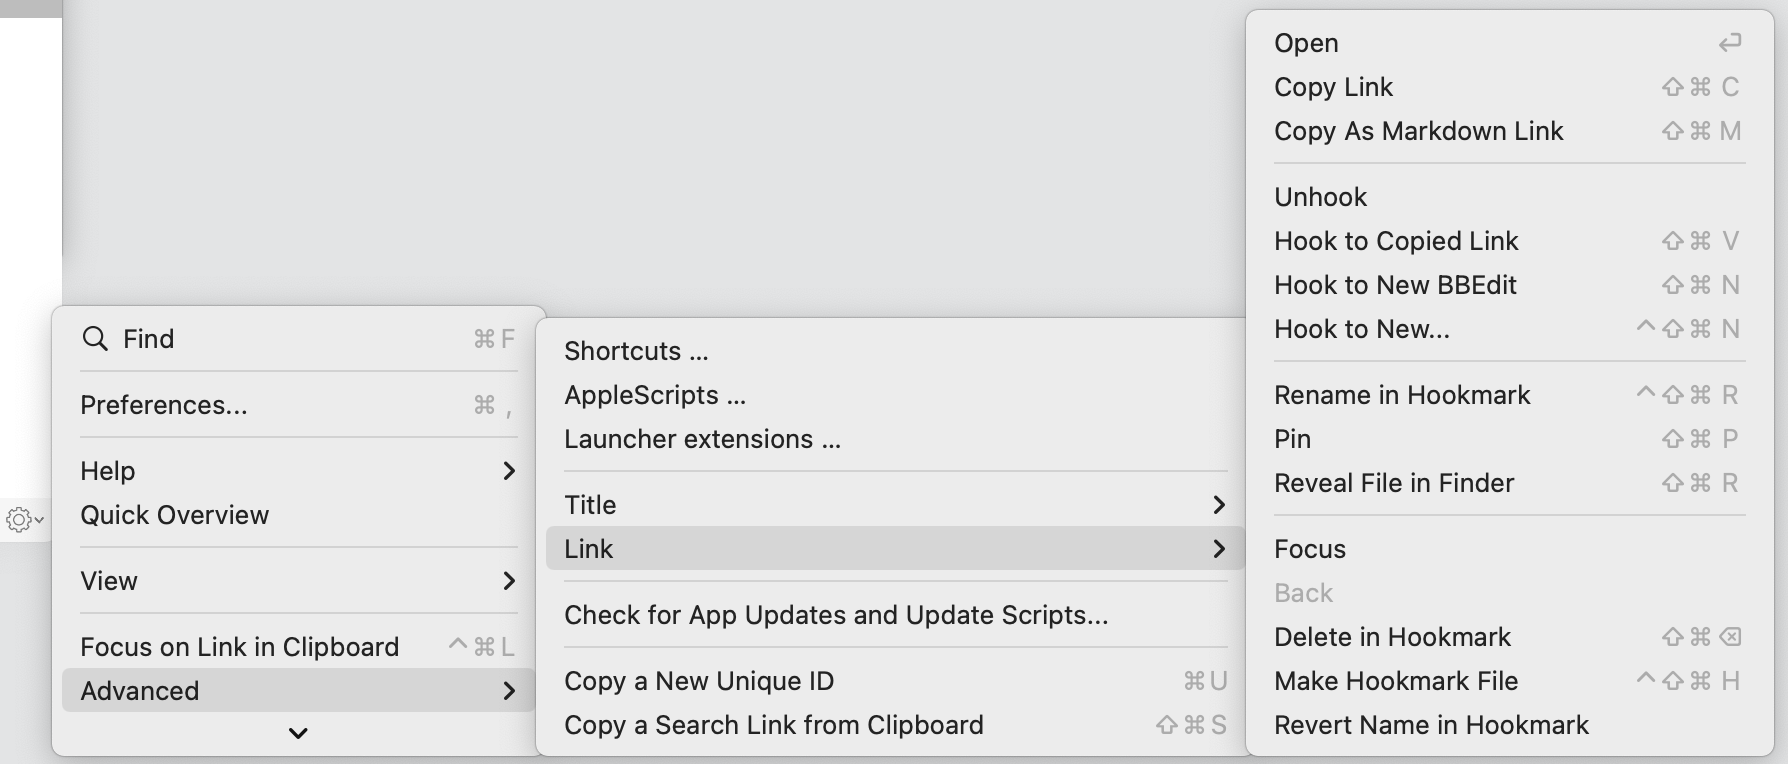
You are not expected to use that deeply nested menu 😊. It’s there for technical reasons to show you the keyboard shortcuts. You can simply get the shortcuts from the image above.
The keyboard shortcuts of the Link menu are the same as the shortcuts of Action ☰ button menu, except they are prefixed by the SHIFT key (⇧).
Selecting a link (in HOOKED, PINNED or RECENT section)
You can select a link by:
- clicking on it;
- using arrow keys (up arrow, down arrow); or
- typing the first letter of its label. If several links start with the same label, then type the first letter multiple times. (Further typing tricks are coming.)
Opening a linked item (in HOOKED, PINNED or RECENT section)
Hookmark is all about opening linked items. There are several ways to do this.
- Select it and hit the return key.
- Double-click on it.
- When you hold down the ⌘ key, Hookmark will display a ⌘# shortcut you can use to access links. For instance, the first link will visibly be accessible via ⌘1, the second via ⌘2, and so on. So:
- ⌘1 opens the first linked item (if there is one)
- ⌘2 opens the second linked item
- ⌘3 opens the third linked item
- …
- ⌘9 opens the ninth linked item
Navigating Items the Hook window
It is possible to navigate the network of Hookmark links, using keyboard shortcuts you would expect. In other words, Hookmark implements emacs style navigation shortcuts (⌃B, ⌃F, ⌃A, ⌃E), and also Safari-style navigation keyboard shortcuts (command ⌘ key combined with arrow keys).
When a link is selected, you can use the ▶ (right-arrow) key or ⌃F to “navigate into” the link. The Title bar of the Hookmark window takes on the name of this link. Therefore, the Title bar menu then applies to the linked object. The LINKS section is then updated to contain all the links of the item you’ve “entered”.
After you’ve focused on a link (in HOOKED, PINNED or RECENT section, you can unfocus (i.e., navigate backwards) with the ◀ (back-arrow key) or ⌃B.
In sum,
- select item above: ⌃P and ↑ (up-arrow)
- select item below: ⌃N or ↓ (down-arrow)
- select the first link in LINKS section: ⌘↑
- select the last link in LINKS section: ⌘↓
- navigate forward (aka “focus”): ▶ (right arrow) key, ⌃F
- navigate back: ◀ (back arrow key) or ⌃B
- navigate to the end of navigation history:
⌘▶(⌘right-arrow) or ^E - navigate to the start of navigation history, which is the original context (title):
⌘◀or ^A
The navigation history is currently not saved across invocations of Hookmark.
Gear menu (⌃G)
You can access the Gear menu with ⌃G or by clicking the Gear icon.
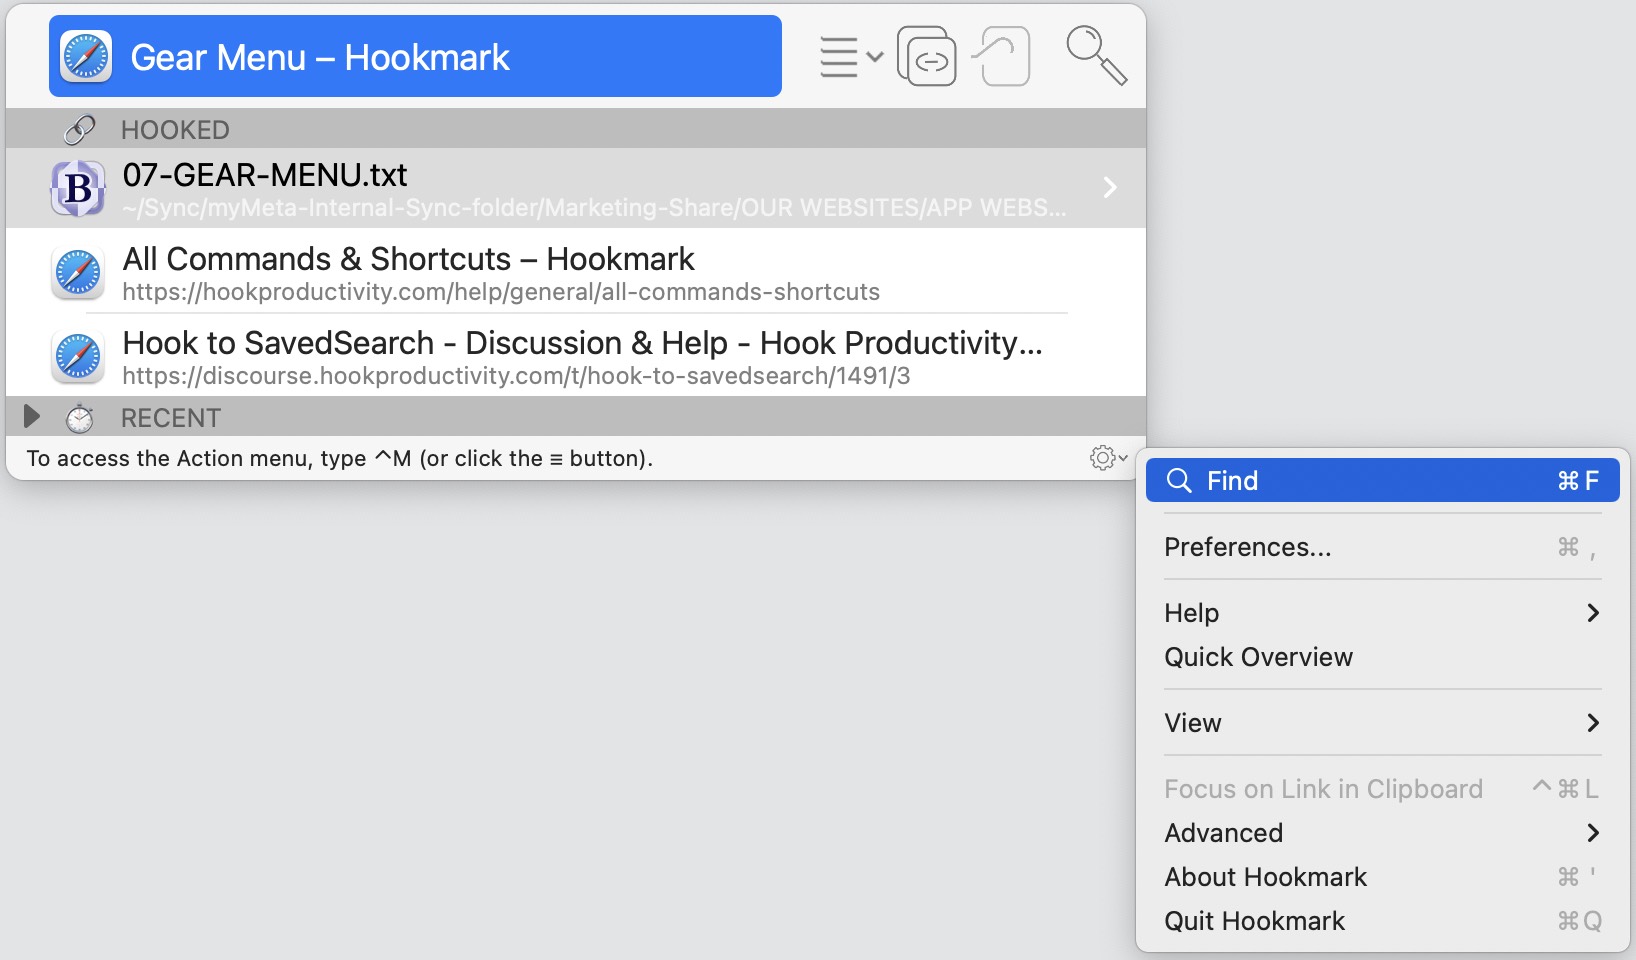
The gear menu, in the top right corner of the Hookmark window, contains several helpful commands. You can use ⌃G to show the Gear menu.
For a list of commands and keyboard shortcuts associated with Gear menu, please refer to the Gear Menu page.
We invite you to learn about this highly useful command:
Focus on Link in Clipboard: ⌃⌘L.
Menu bar icon
- Show menu bar window: ⌃⌥⌘M (This can be configured in Shortcuts window).
The effect of clicking on Hookmark’s menu bar icon depends on a setting in the General preferences pane. It will either show the Hookmark window, or it will show the menu bar window. ⌥-click on the Hookmark icon will also show the menu bar window.
The menu bar icon also contains a gear menu, which repeats commands in the Hookmark popup window gear menu.
Legend
- ⌥ :
optionkey - ⌘:
commandkey - ⌃:
controlkey - ⏎:
returnkey