When you bring up Hookmark for the first time ever on a particular web page, such as this one, all you will see is the title item, like this:
![]()
After you’ve hooked something (like a text file via Hook to New) you see one or more hooked, like this:
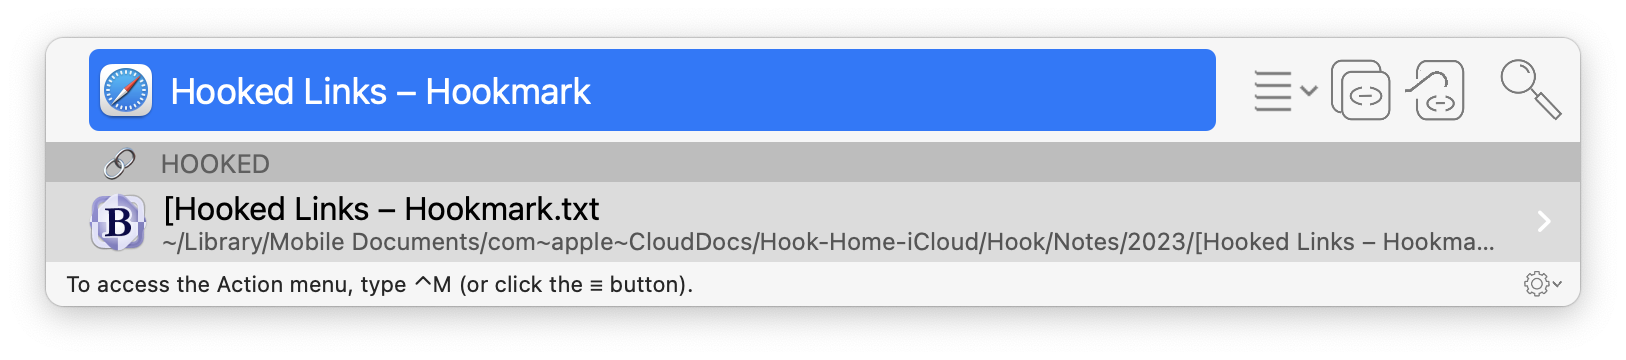
Then you can use Hookmark to instantly open that item:
- Bring up Hookmark; and
- double-click on the hooked item.
Or use a keyboard shortcut to select the item and then use ⌘O.
This means you can immediately open the [Hooked Links - Hookmark.txt file from the web page to which it is hooked, and vice versa. If you can find one item, then you can find the other, even though one is on the web, the other on your local Mac.
Navigating up and down hooked items
You can
- use ↓ down and ↑ up from the title to the hooked items, and back again.
- you can type the first character of a hooked item that you want to select. Repeatedly typing that character will select the next item that starts with that character.
Please note that you can select the title item or a hooked item.
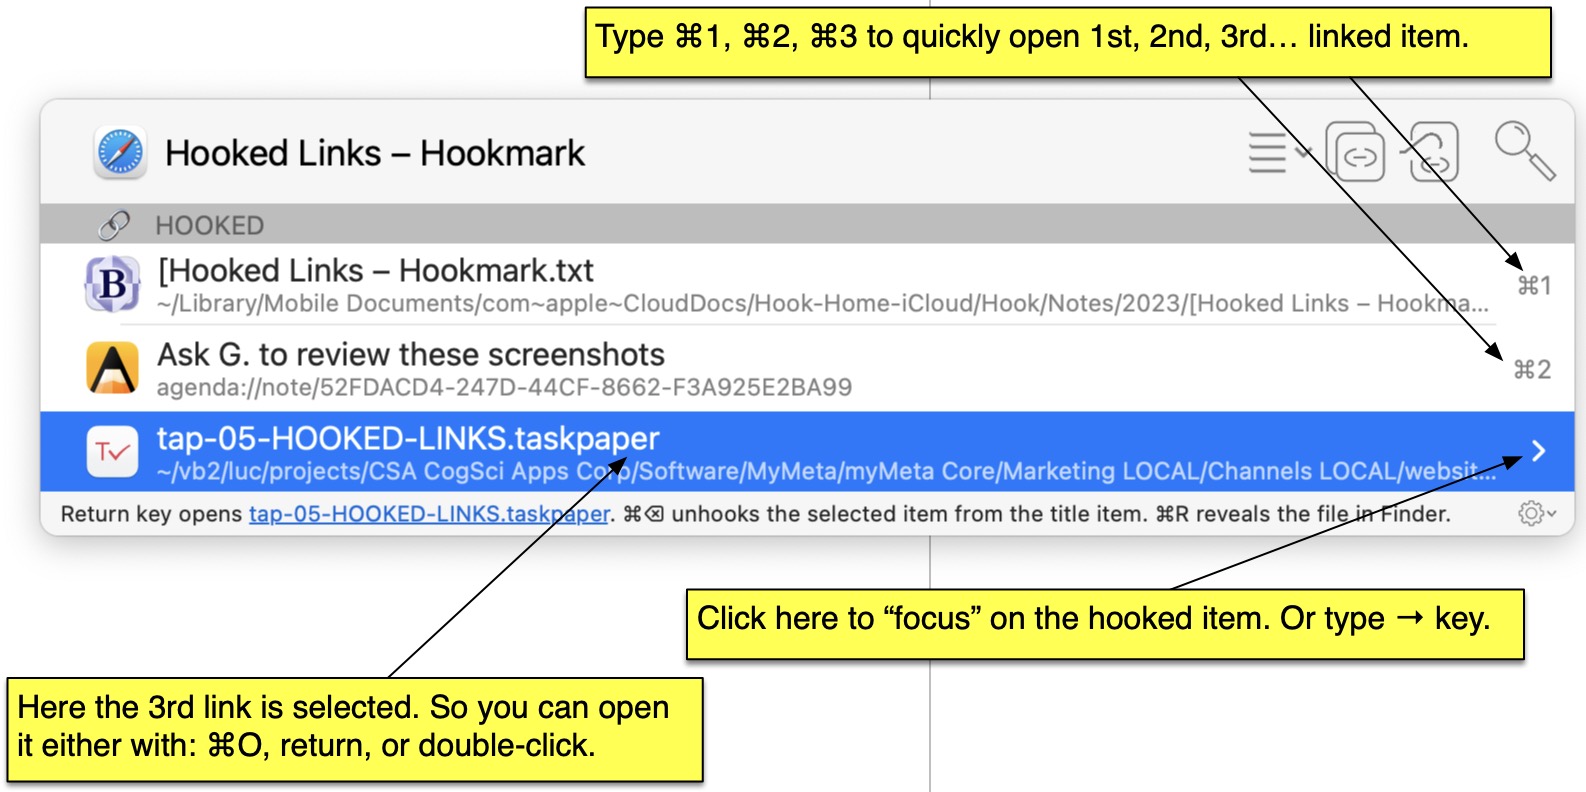
Shortcuts to open a hooked item
When you press the command (⌘) key, you can see that each of the first nine hooked links has a number on its right. You can open the first hooked item with ⌘1, the second with ⌘2, and so on to ⌘9.
Contextual menu
Instead of using the Action menu, if the hooked link you want to access is not currently fully selected (or even if it is, per the screenshot below), you can save a step by control-clicking on the link (or use the trackpad):
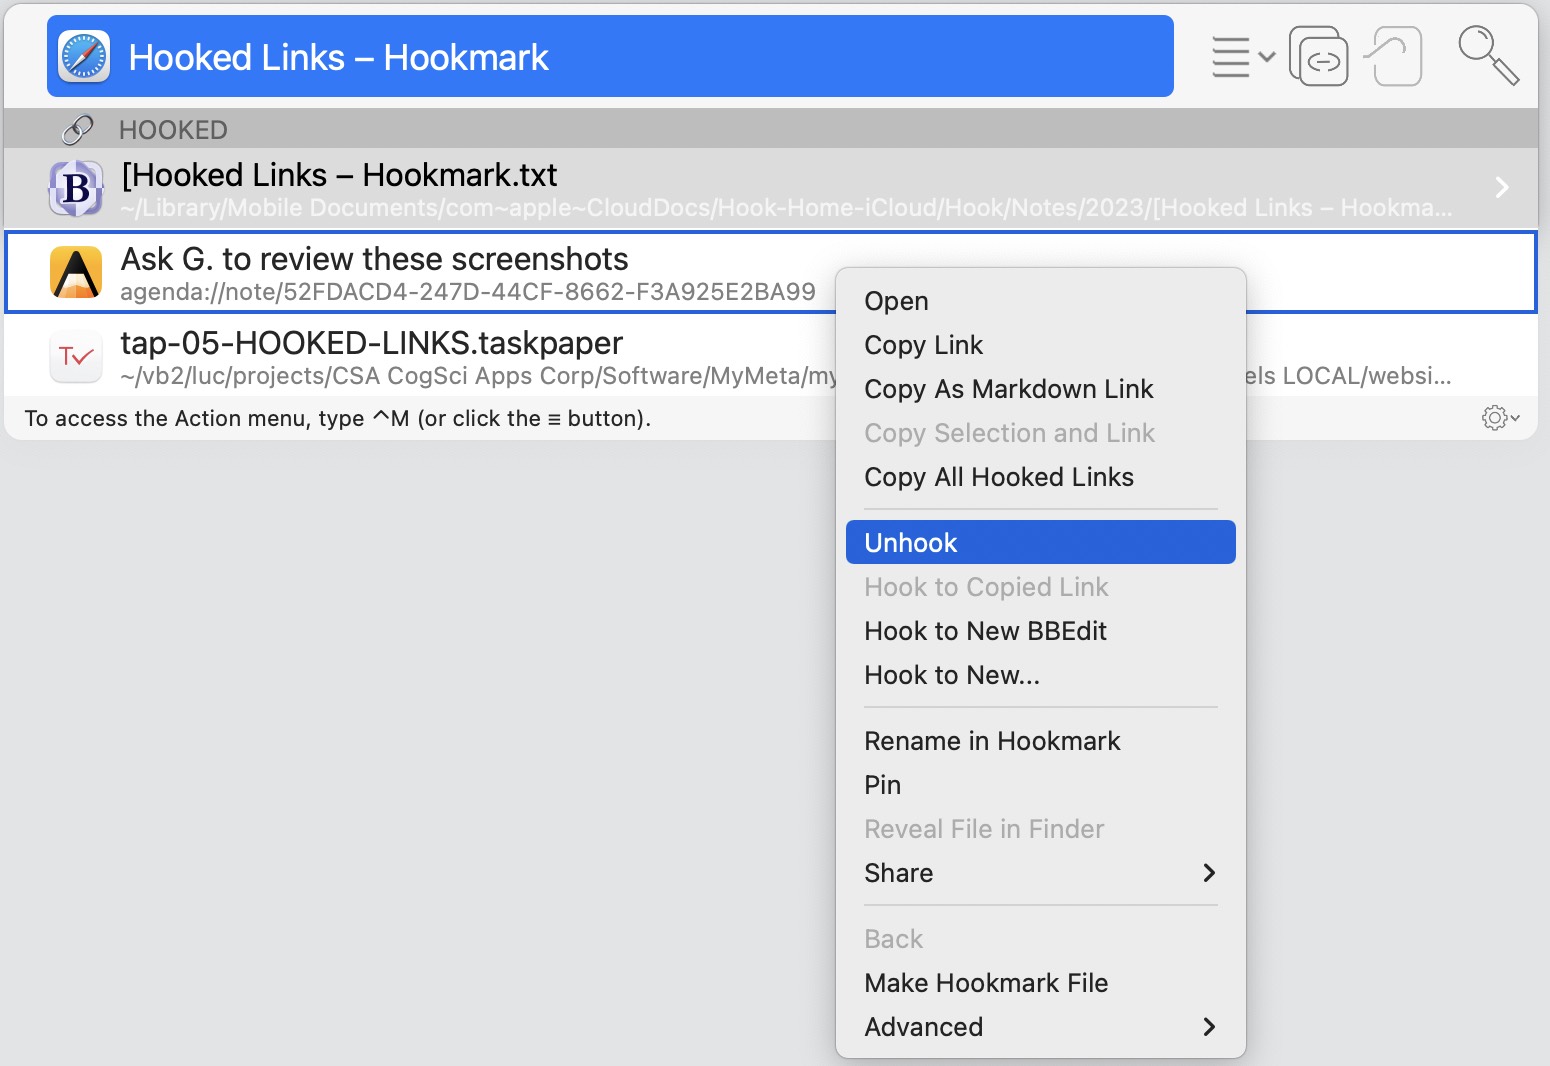
NB: the “Unhook” command displayed above removes the hook between the title item (here “Hooked Links – Hookmark”) and the link on which you invoked the pop-up menu. This does not delete the entire bookmark, just the hooked link that connects the title item (“Hooked Links – Hookmark”) to the item you’ve selected (“Ask G. to review these screenshots). (To remove the entire bookmark, use the “Advanced” menu item.
Focusing on (i.e., “navigating to”) hooked links
Once you’ve selected a link in the HOOKED section, you can make it the Title by “focusing” on it. To do this, you can either:
- use the right arrow key →
- click on the
>btn to the right of the hooked link - click on the Action (☰) button and select the Focus menu-item.
Here’s what the window might look like after you focus on (“navigate to”) the hooked Ask G. to review these screenshots item:
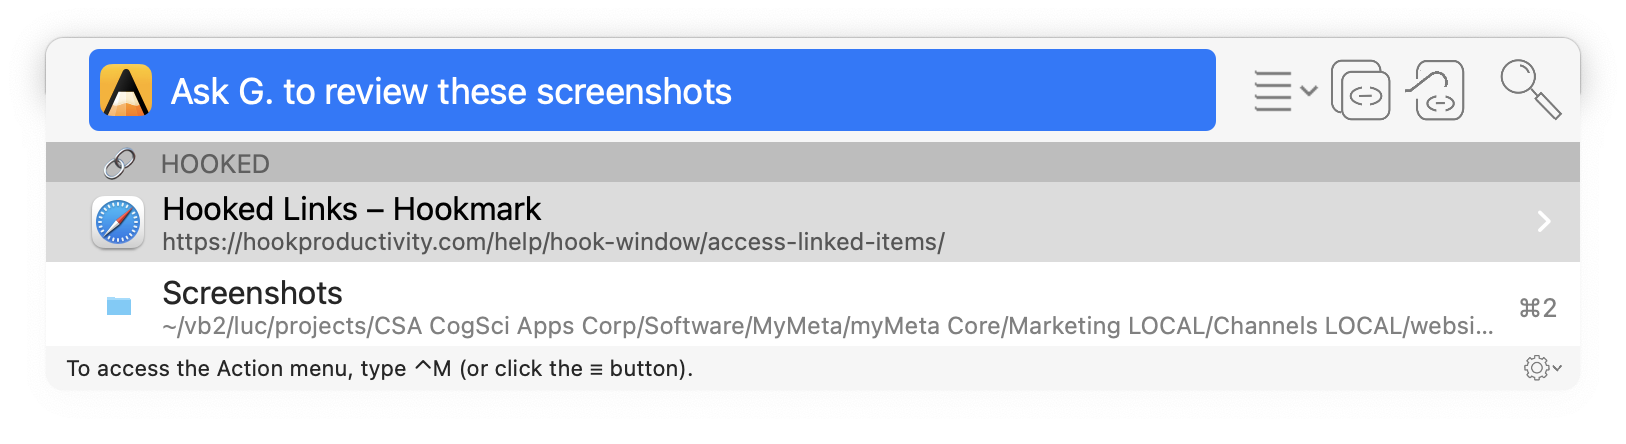
Notice in the image above that
- the “Hooked Links — Hookmark” web page is now displayed in the HOOKED section.
- there’s an additional item , a Screenshots finder folder, that is not directly hooked to the original web page.
This allows quick access to the network of links: items linked to a linked item (recursively).
Instead of using the ❭ button, you can navigate between linked items by selecting them and pressing the ► (right arrow) key on your keyboard.
You can navigate back to previous items with the ◄ (left arrow) key, or by clicking the < button that appears on the left side of the title bar when you have navigated into (focused on) a link.
Upshot: Hookmark’s context window is a link navigator. This is incredibly handy. Whereas the Finder let’s you navigate in a strict hierarchy, Hookmark allows you to create and navigate arbitrary networks of information.
For example, if you’ve forgotten where you’ve stored the screenshots for a particular web page, you can open it via this crumb-trail:
- Access the original web page (easy to find).
- go to the associated task.
- Open “Screenshots” from there.
Or search in Hookmark’s bookmarks. In an upcoming release, you will be able to see the full network of indirectly linked items within the Hookmark window.